
Guide
How to set up online booking for your business
Every screen you will see, from creating your account to sharing your booking link. Most businesses are done in about half an hour.
About 30 minutes 14 steps Updated
This walks through registering a business on Take Bookings Now, one screen at a time, using a made-up yoga studio that offers both a weekly class and one-to-one massages. Your screens will look the same with your own details in them.
Before you start, have your opening hours, a rough list of what you offer with prices and how long each takes, and the names of anyone customers can book with. No card details are needed — your 14-day free trial starts when your business is approved.
Your progress is saved at every step. Close the page halfway and sign in later: you pick up where you left off.
Register your business
Create your account
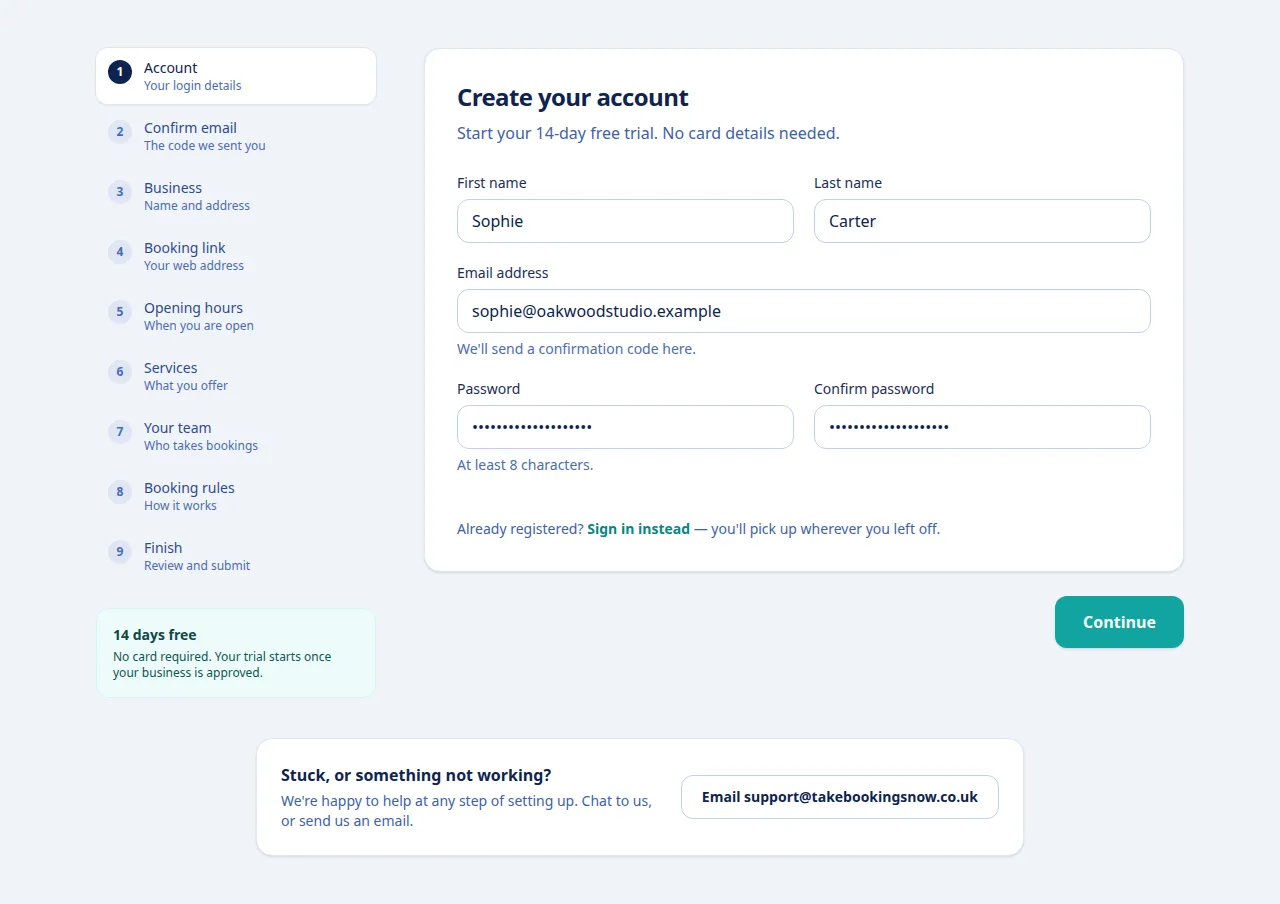
Go to Start free trial and enter your first and last name, the email address you want to sign in with, and a password of at least eight characters.
Use an address you can open right now — the next step sends a code to it. If the password has appeared in a known data leak you will be asked to pick another; that check keeps your customers' details safe.
Confirm your email address
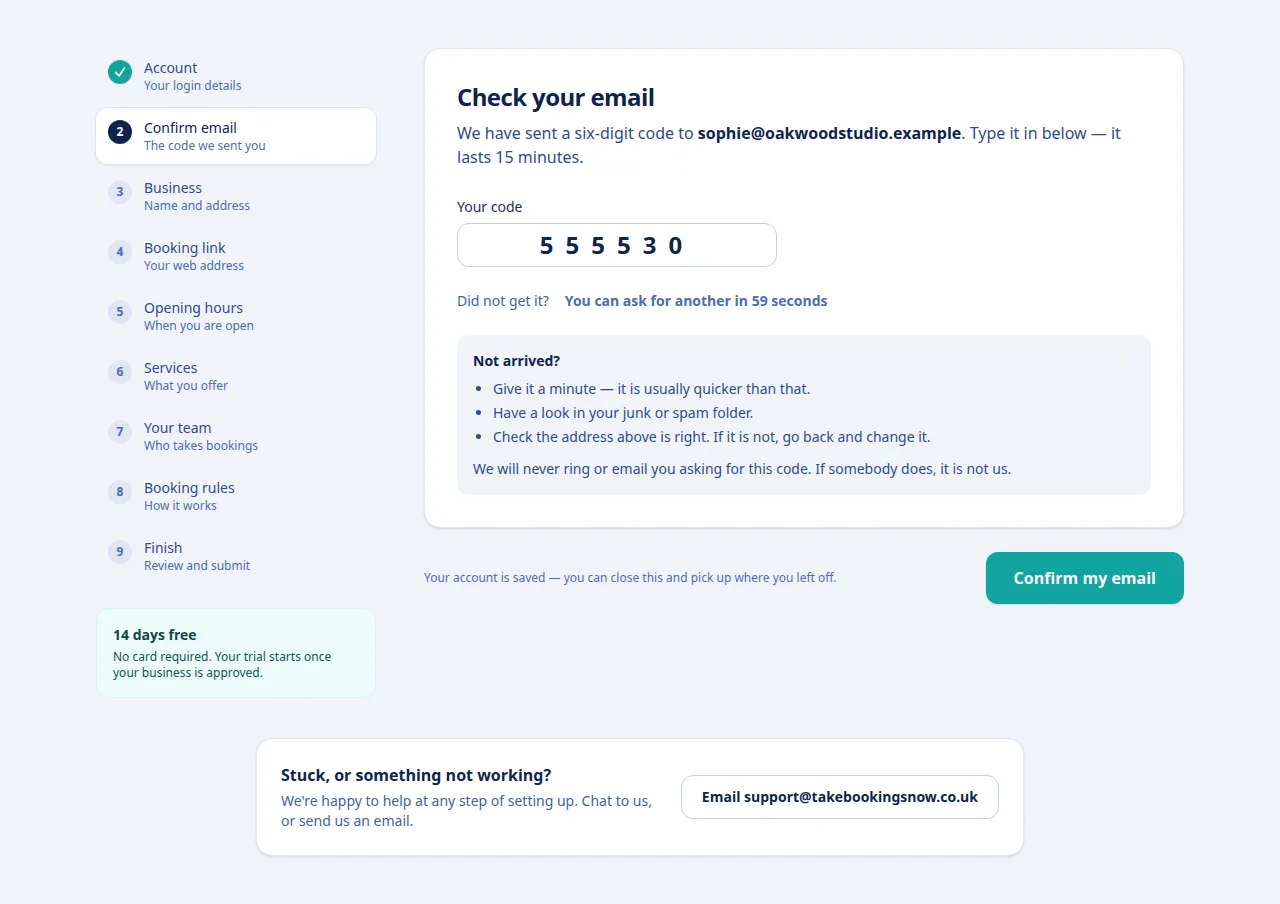
We email you a six-digit code. Type it in and choose Confirm my email. The code lasts 15 minutes, and you can ask for another after a minute.
Nothing there? Give it a minute, then look in your junk or spam folder. We will never ring or email you asking for this code.
Tell us about your business
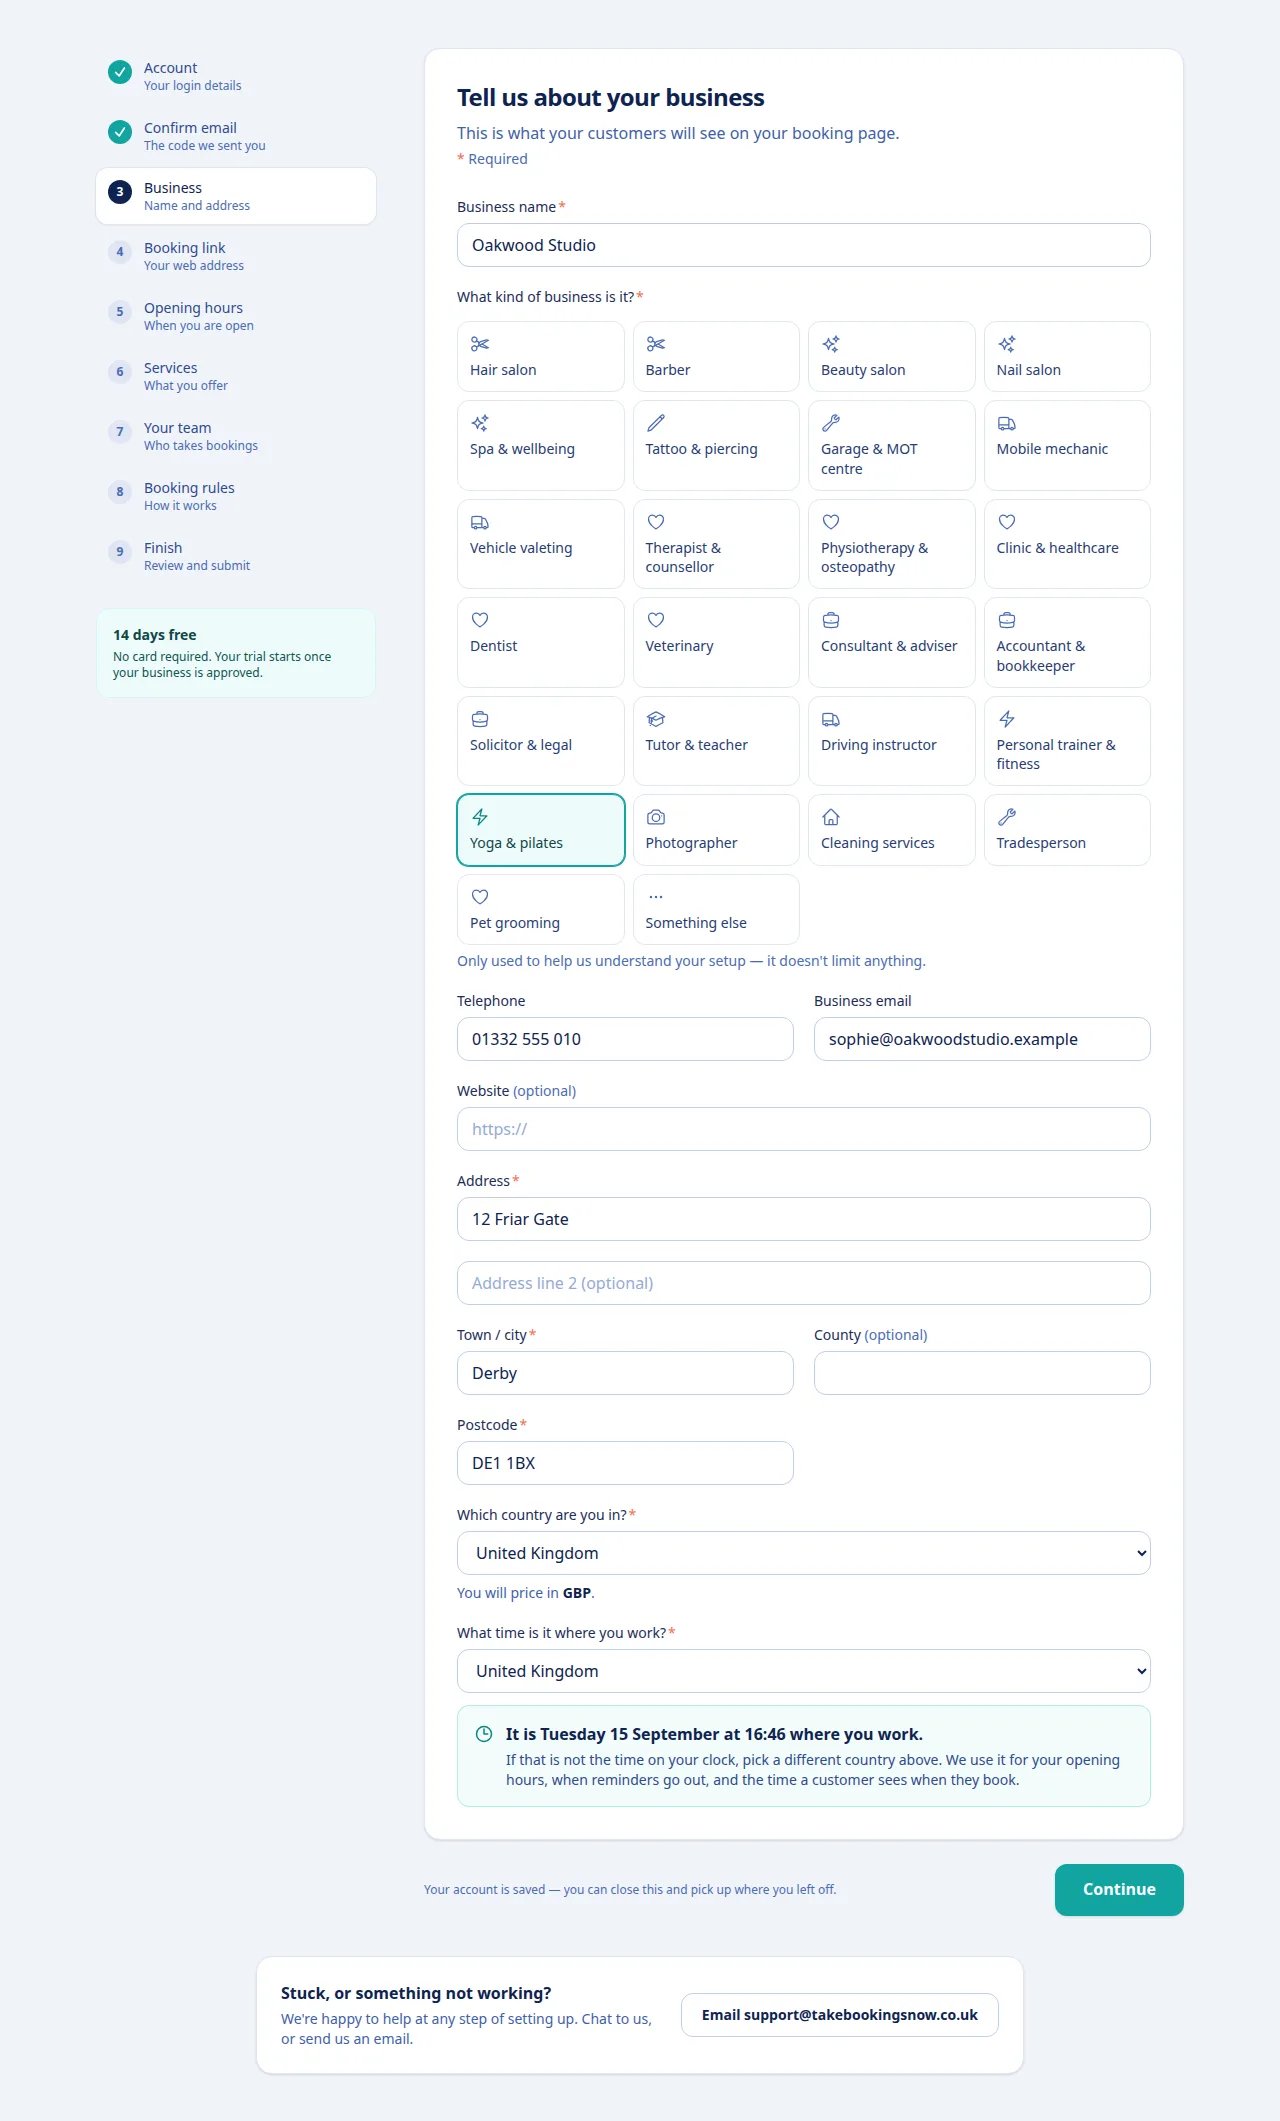
This is what customers see at the top of your booking page: your business name, what kind of business it is, a telephone number and email, and your address. A website is optional.
Type your postcode and the town is filled in for you. Then check the country and what time it is where you work — the time shown underneath should match your clock, because it decides your opening hours, when reminders go out and the times customers see.
Choose your booking link
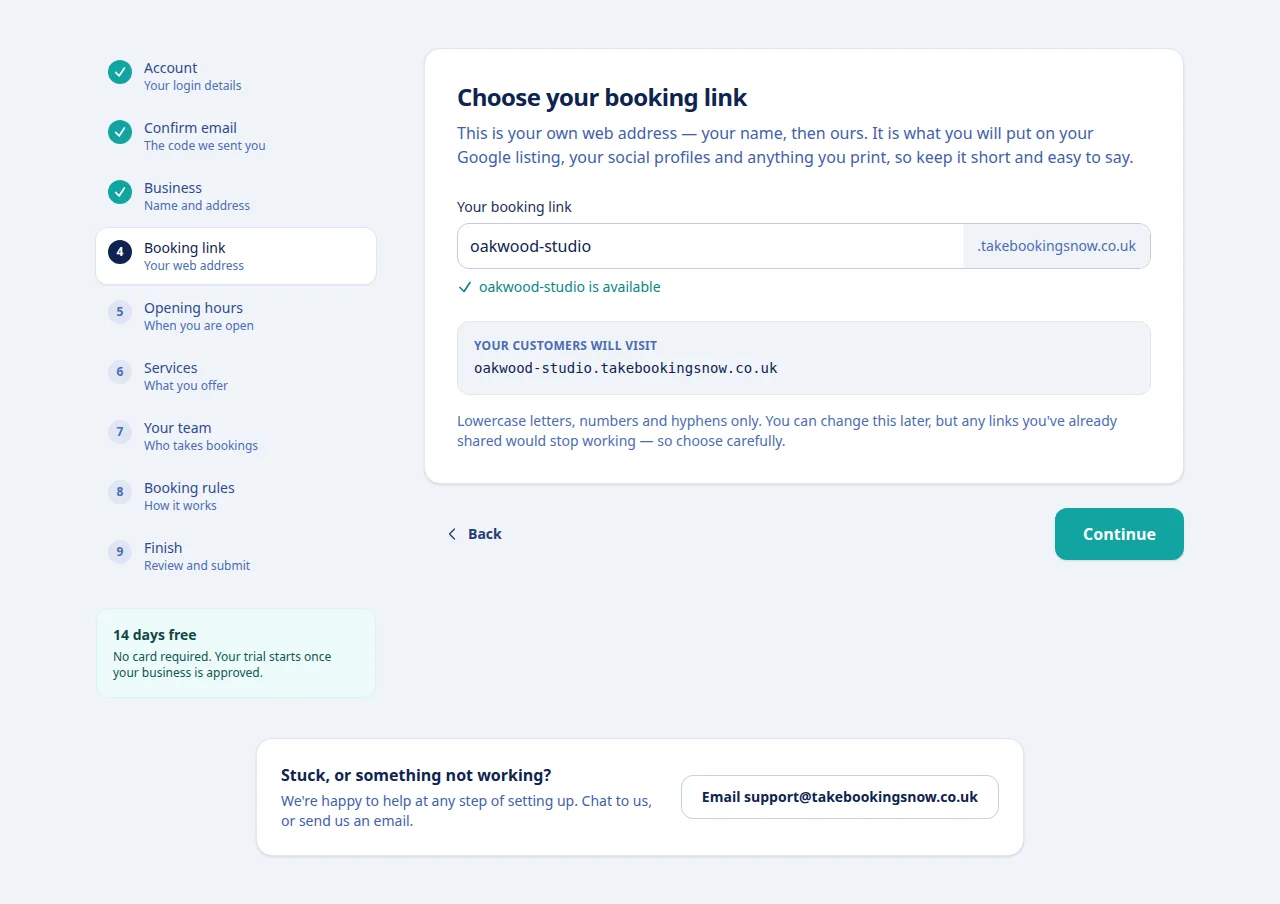
This is your own web address, for example your-business.takebookingsnow.co.uk. It goes on your Google Business Profile, Instagram and Facebook bios, your website and anything you print, so keep it short and easy to say.
We check it is free as you type. Lowercase letters, numbers and hyphens only. You can change it later, but links you have already shared would stop working, so it is worth getting right now.
Set your opening hours
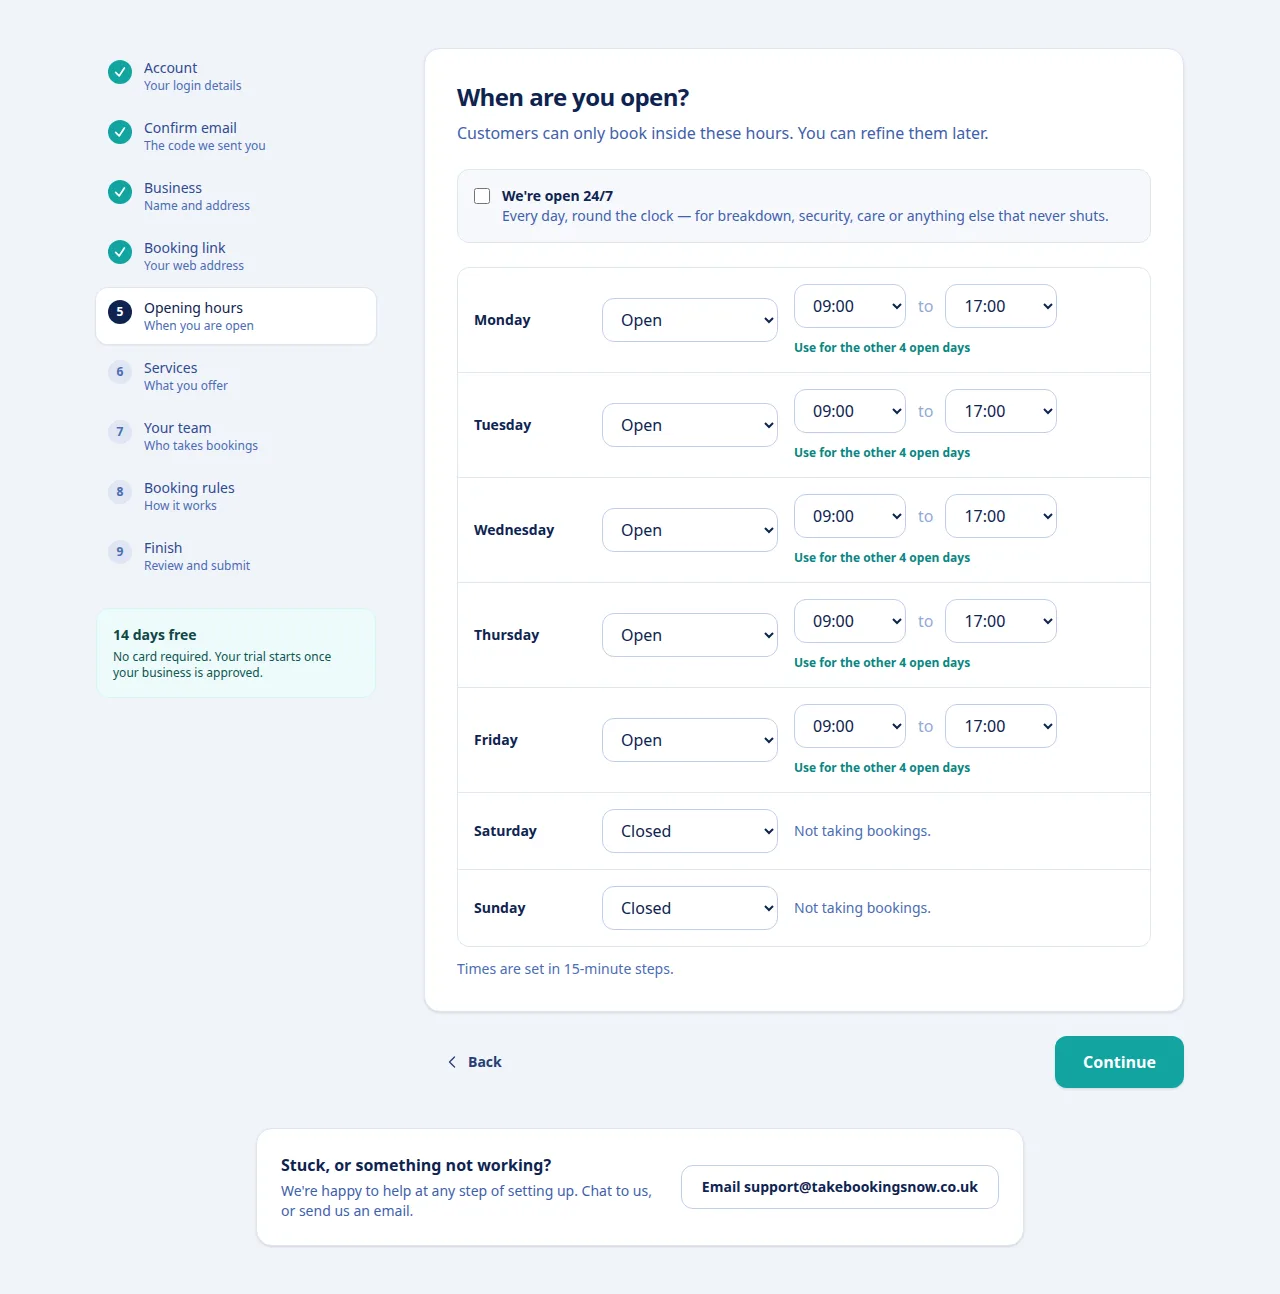
Choose open or closed for each day, and the times. Set Monday, then use Use for the other open days to copy it across. Times go in 15-minute steps.
Customers can only book inside these hours. If you never close — breakdown cover, security, care — tick We're open 24/7. Split days, breaks, holidays and each person's own hours can all be set once you are in.
Add what you offer
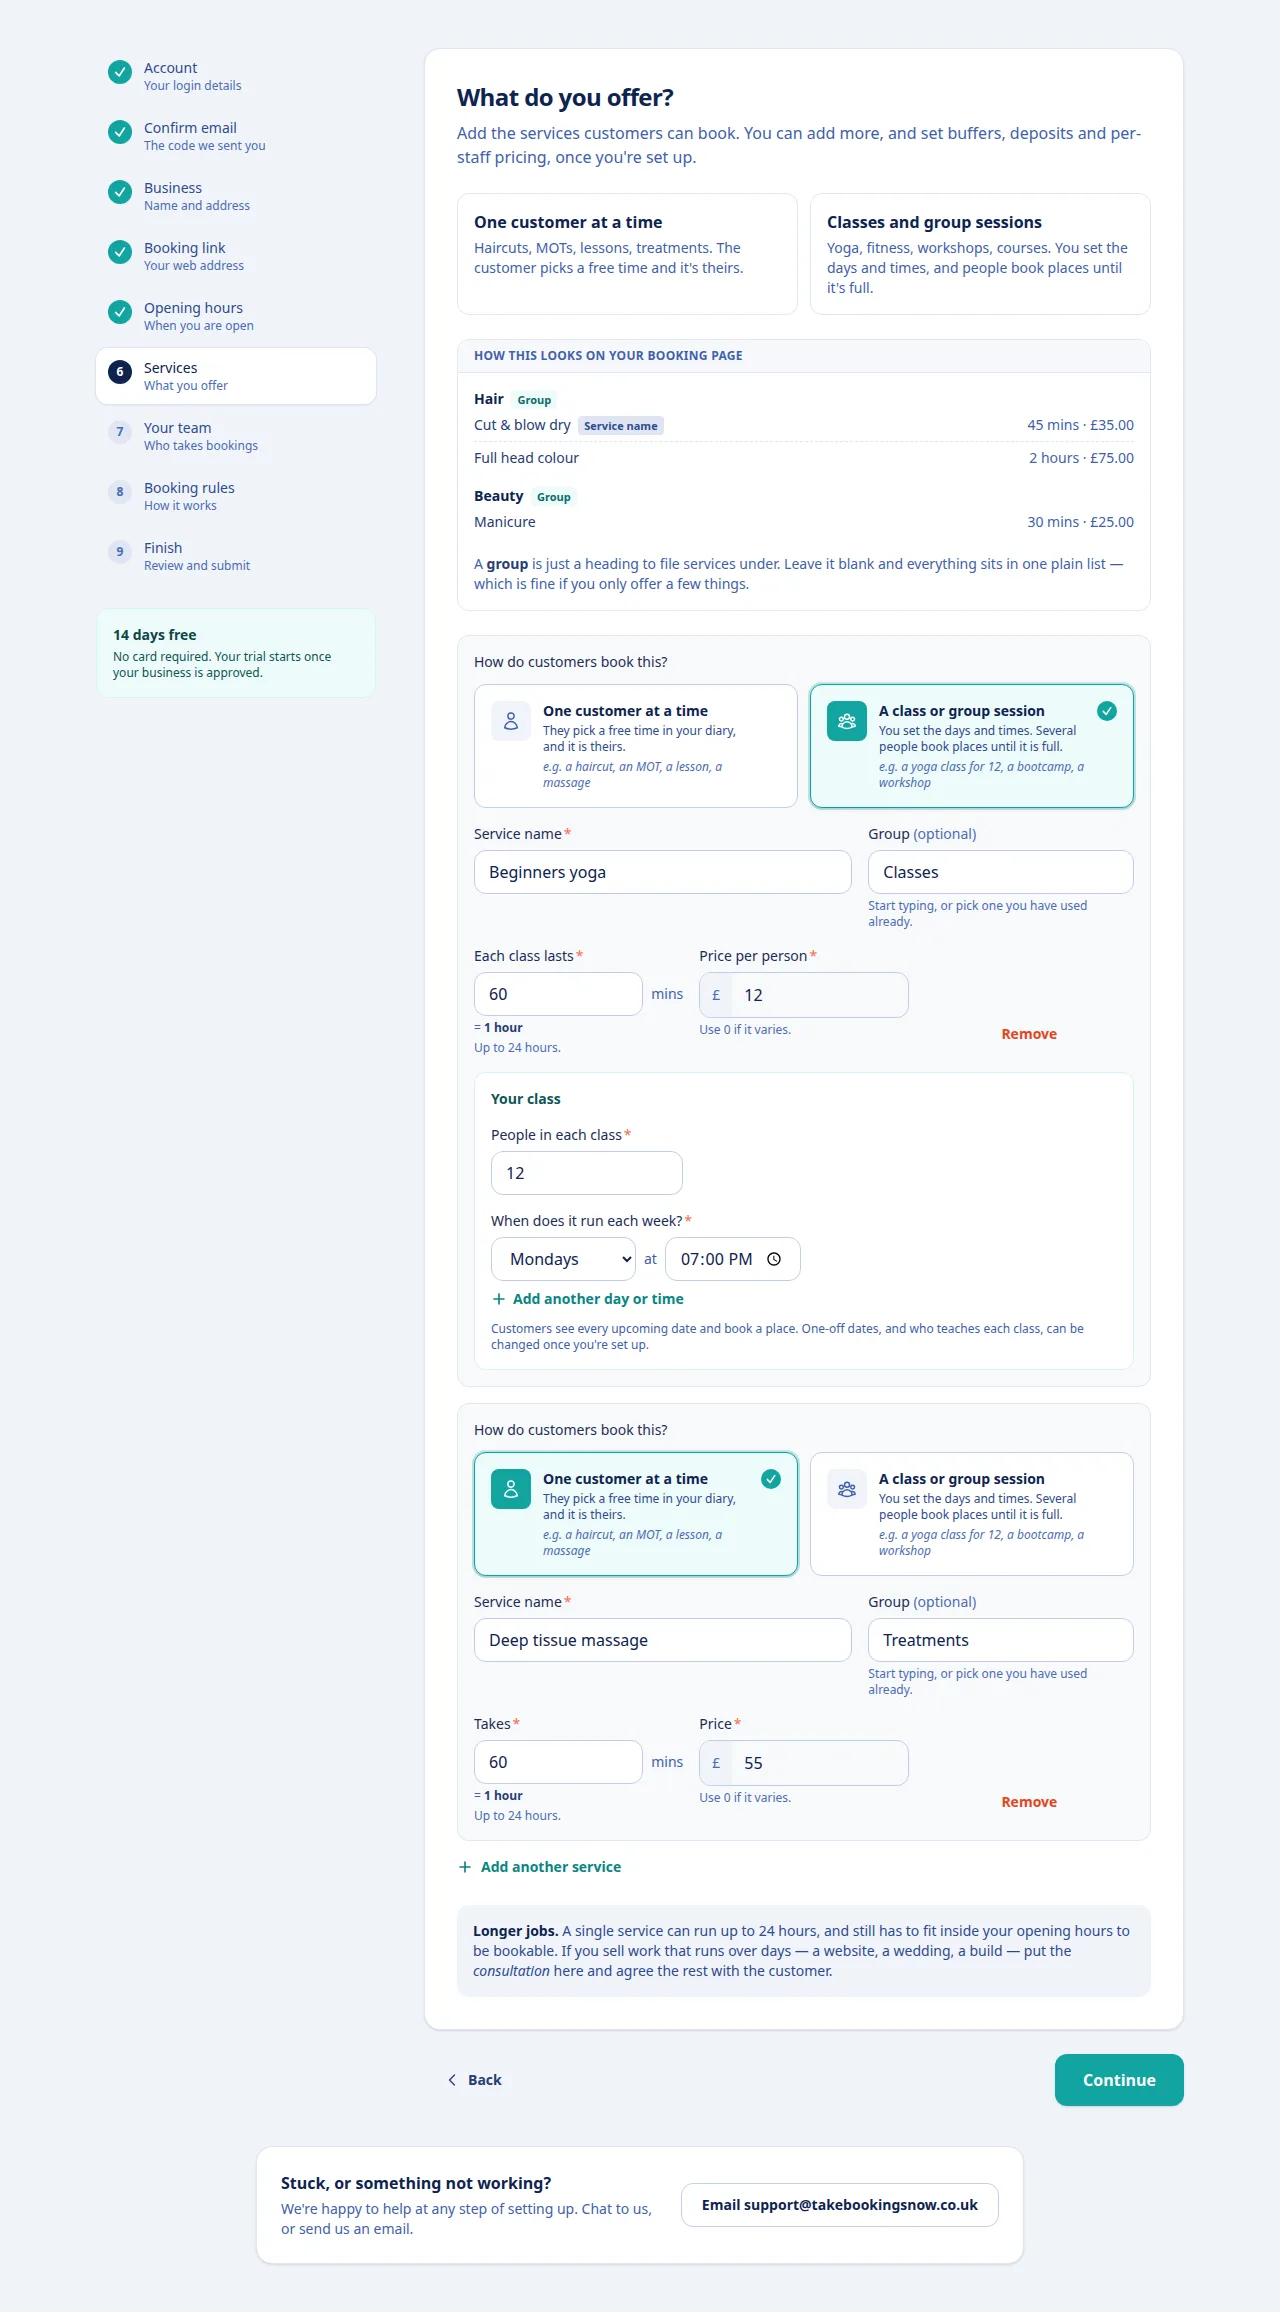
For each service, first answer How do customers book this?
One customer at a time is an appointment: the customer picks any free time in your diary and it is theirs — a haircut, an MOT, a lesson, a massage. A class or group session runs at times you set, and several people book places until it is full — a yoga class for 12, a bootcamp, a workshop.
Then give it a name, how long it takes and the price. For a class, also say how many people fit in each one and which day and time it runs each week. Add another day or time if it runs more than once.
A group is just a heading your services are filed under on your page, like "Classes" and "Treatments". Leave it blank if you only offer a few things.
Add your team
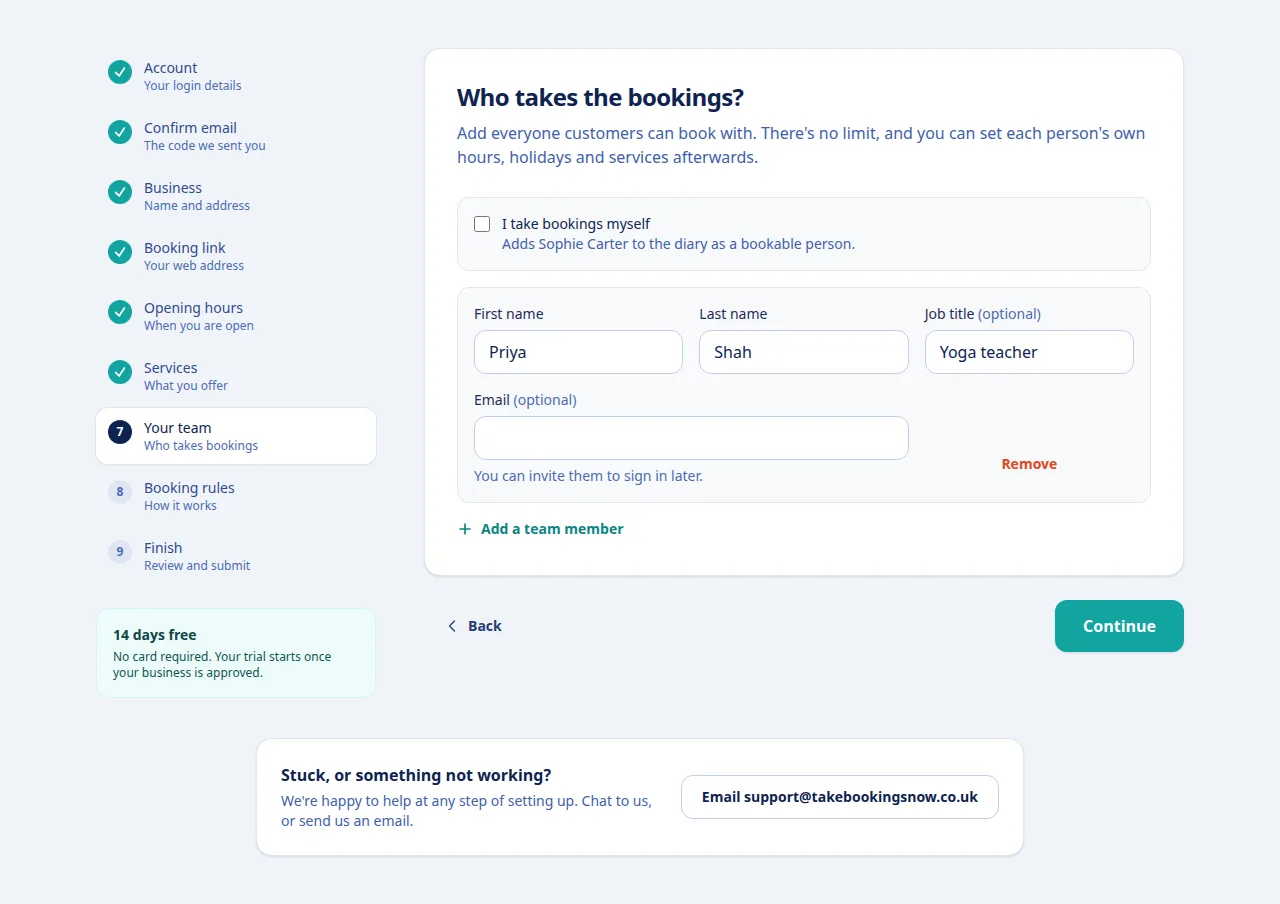
Add everyone customers can book with — first name, last name and, if you like, a job title. Tick I take bookings myself if you do the work too. There is no limit and no charge per person.
An email address is optional. You can invite people to sign in later; somebody can be bookable without ever having a login.
Set the booking rules
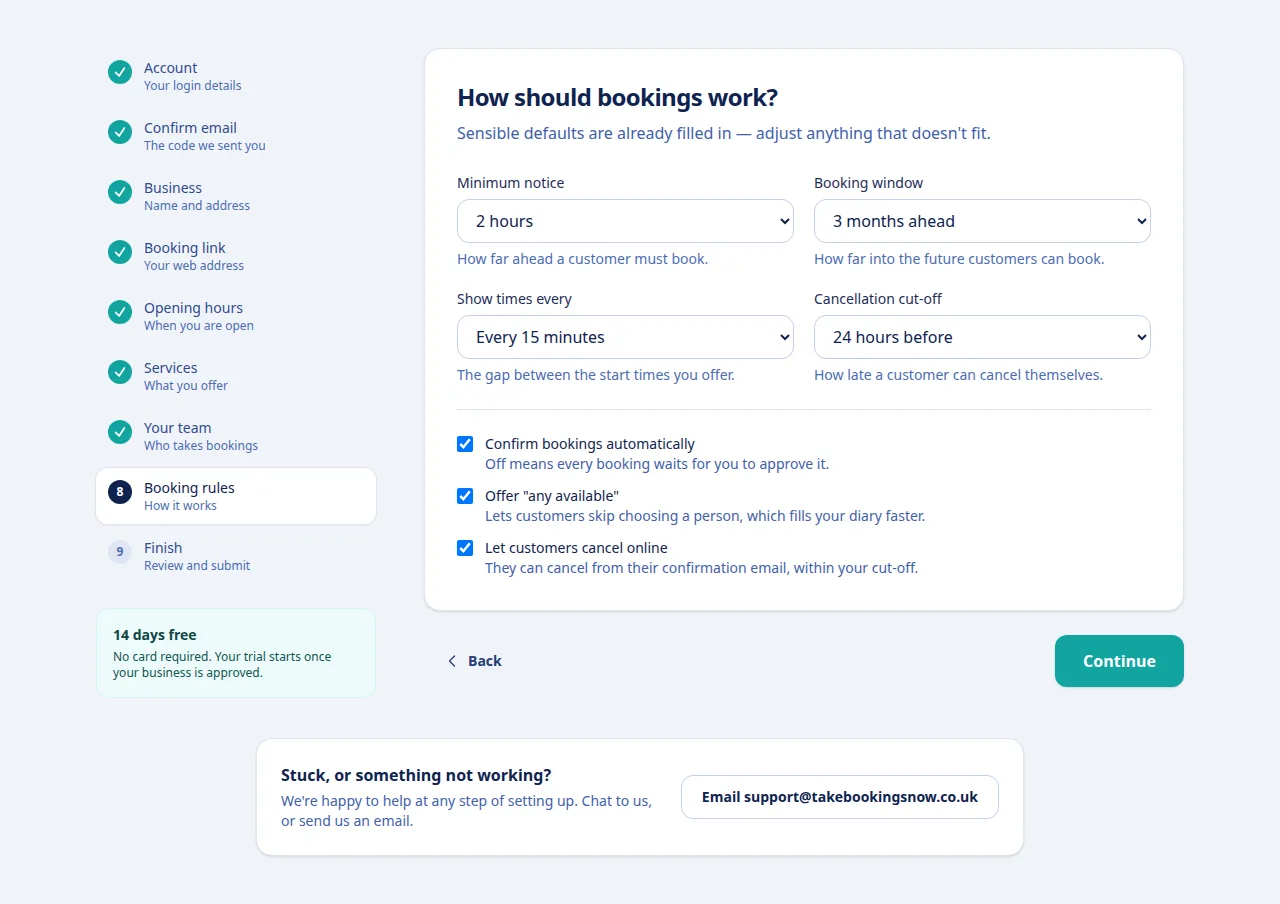
Sensible defaults are already filled in, so most people only glance at this. Minimum notice is how far ahead a customer must book, the booking window is how far into the future they can, and show times every is the gap between the start times you offer.
Decide whether bookings are confirmed automatically or wait for you to approve each one, whether customers can choose "any available" person, and whether they can cancel online up to your cut-off.
Check it over and submit
You get a summary of everything you entered. Use Back to change anything, agree to the terms and licence agreement, and choose Complete registration.
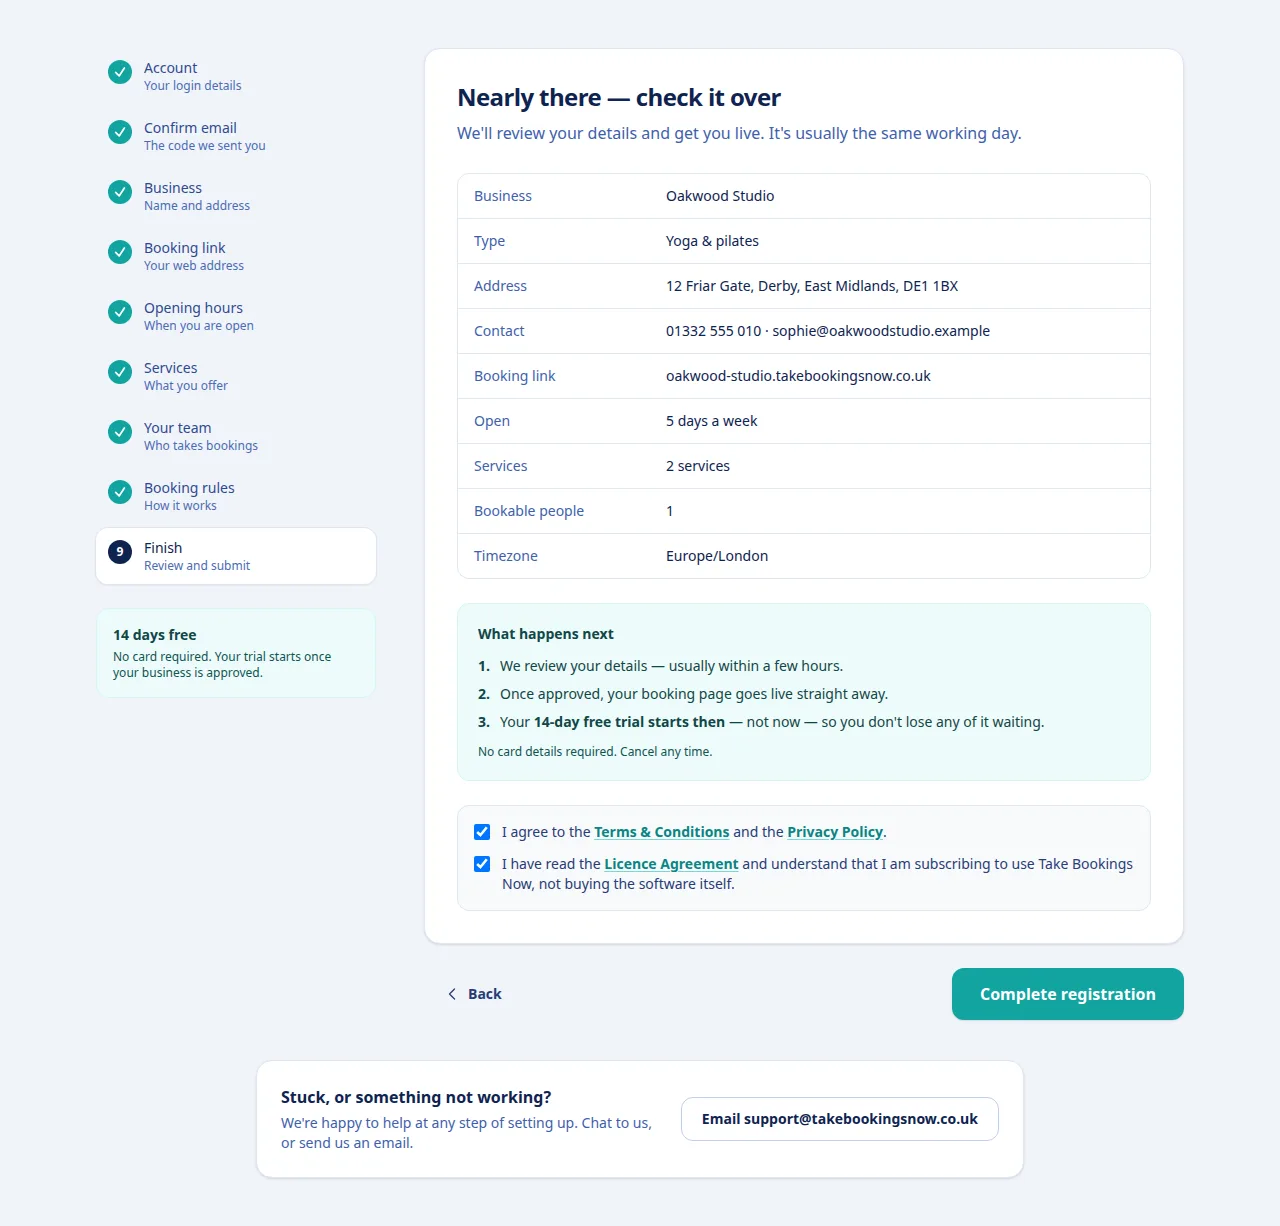
We review your business
A person looks at every new business before its booking page goes live — usually within a few working hours. We email you the moment you are approved.
Your 14-day free trial starts on approval, not when you registered, so none of it is spent waiting.
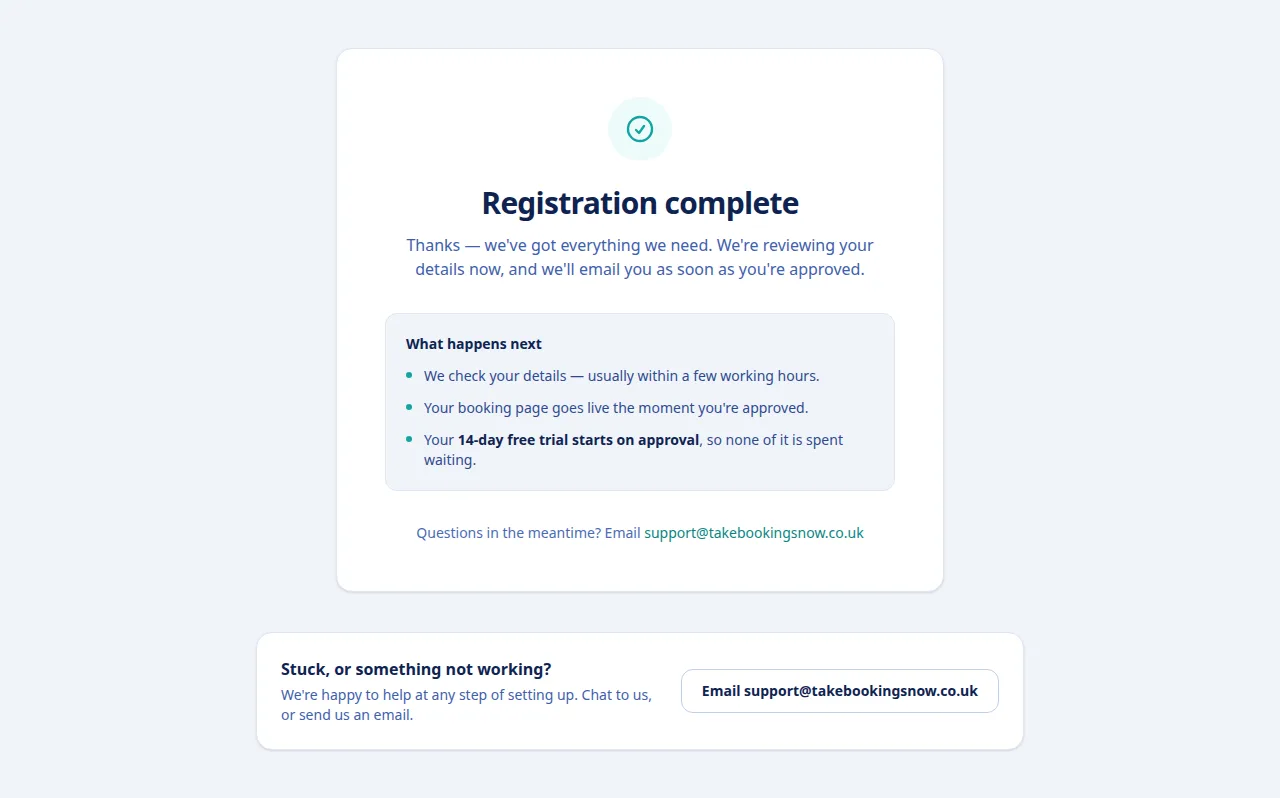
Once you are approved
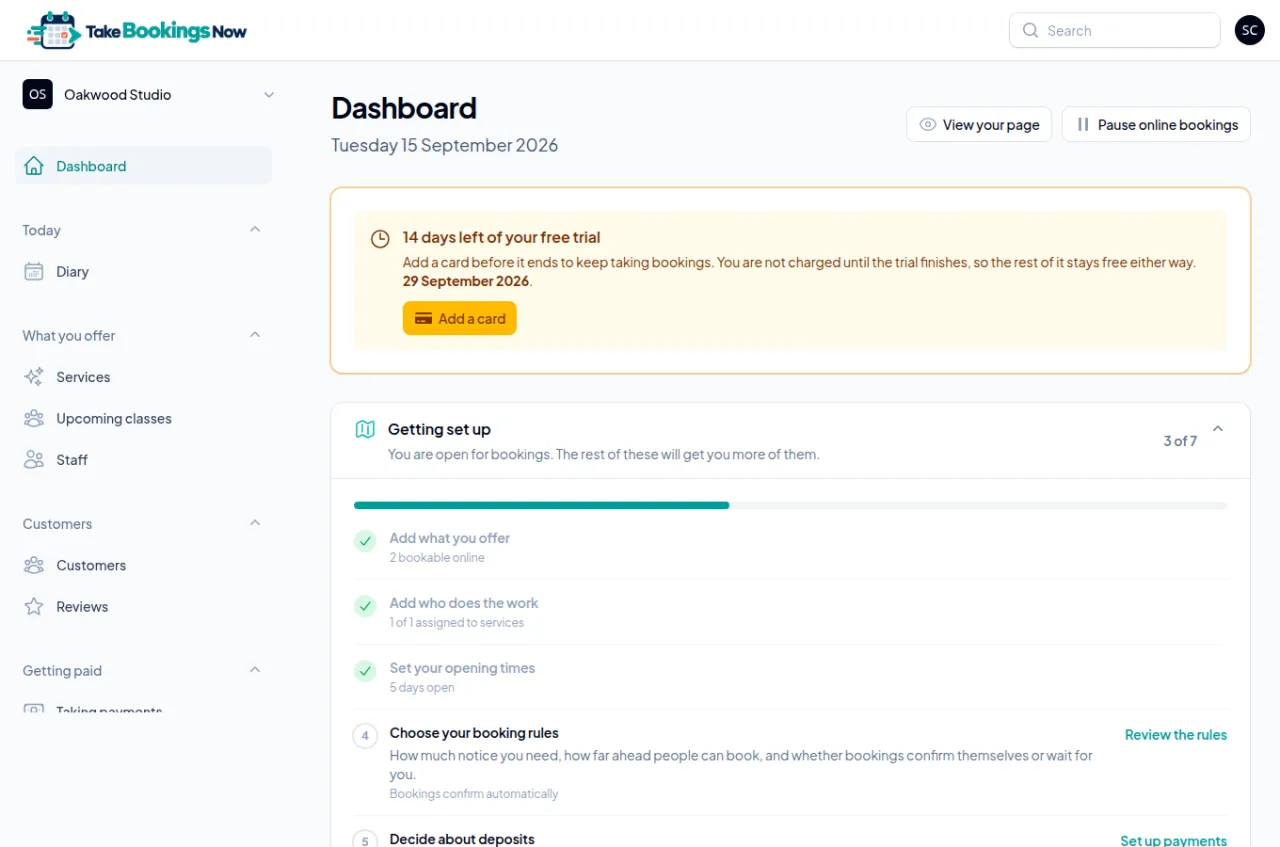
Sign in and follow the checklist
Your dashboard has a Getting set up checklist that ticks itself off as you go: booking rules, deposits, your public page and the rest. View your page opens your booking page as a customer sees it.
New to it? Choose Show me around under your name, top right, for a short tour of where everything lives — services, classes, the diary, customers and getting help. Paid extras come with their own walkthrough when you switch them on.
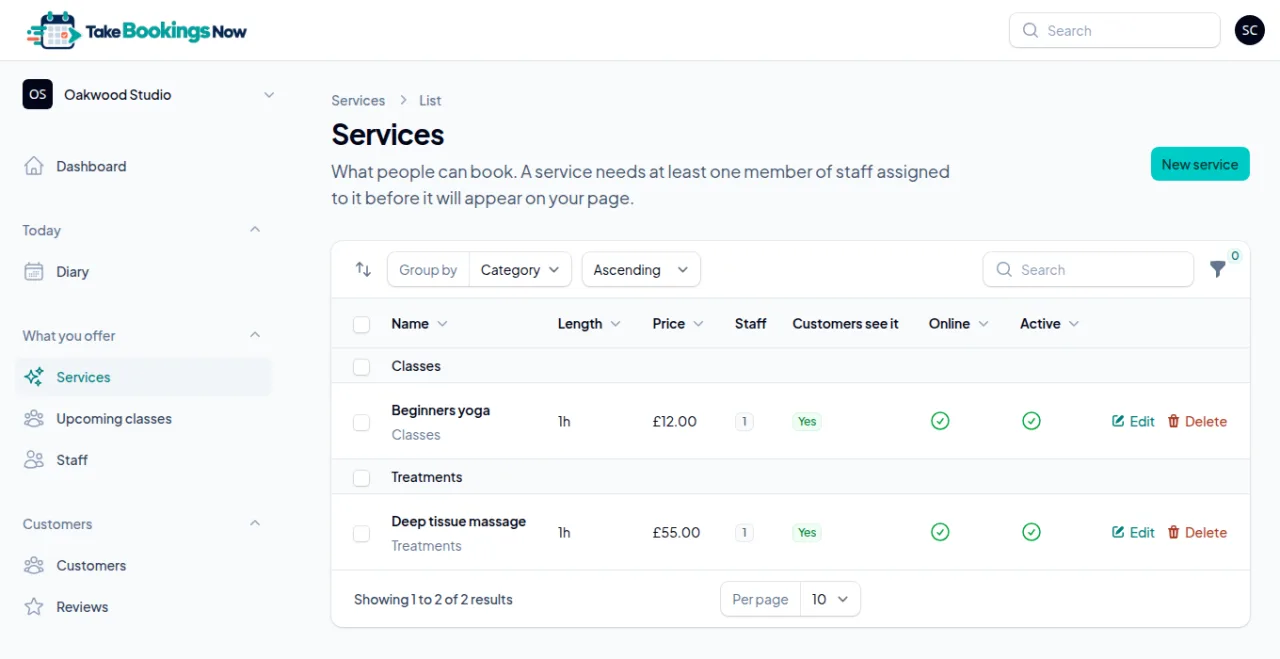
Fine-tune your services
Under Services, open one to add a description, buffer time before or after, a deposit, a colour for it in your diary, and a different price or length for particular members of staff. Drag services and their groups into the order customers should see them.
Each service also has What customers are told: a note shown on your booking page while they choose ("Please arrive with dry hair") and one added to their confirmation screen and email ("Parking is round the back").
Decide about taking payment online
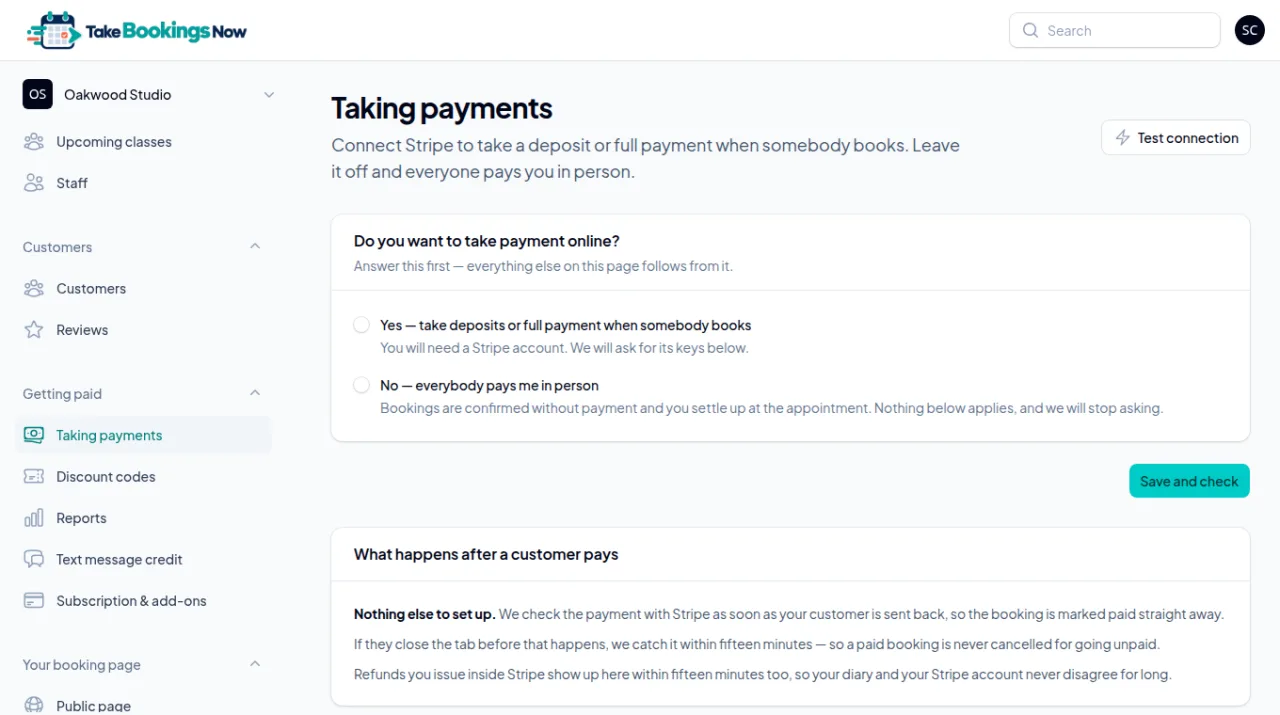
Payment is optional and off until you switch it on. Under Taking payments, answer the first question: take deposits or full payment when somebody books, or have everybody pay you in person.
Online payments go through your own Stripe account, straight to you. Take Bookings Now takes no commission on your bookings.
Make your page yours, and share the link
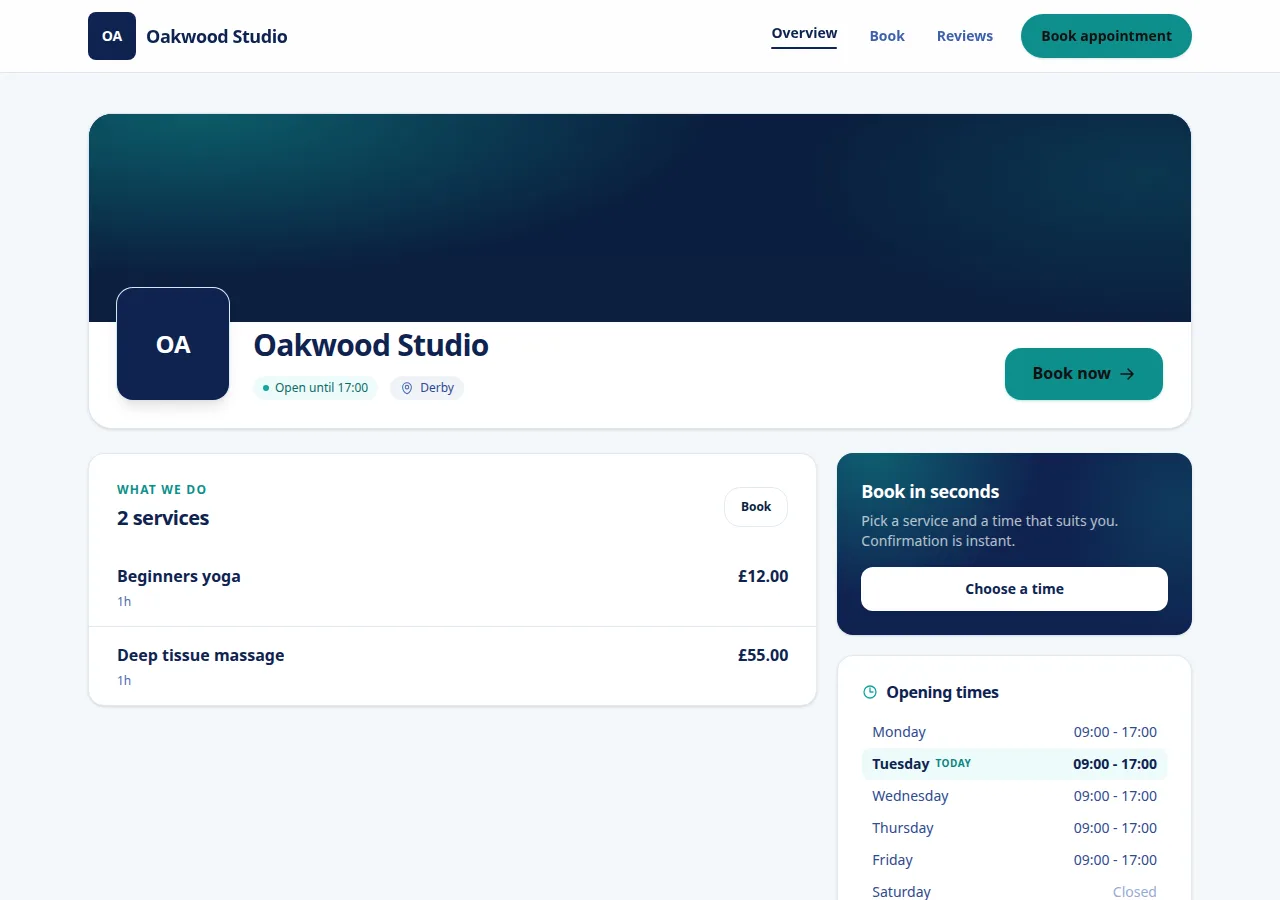
Under Public page, choose a layout and a look, add your logo, a cover photo, a short introduction, a gallery and your policies, and switch on reviews. Every change shows on your page straight away.
Then share your booking link: your Google Business Profile, Instagram and Facebook bios, your website's "Book now" button, and your email signature. Phone and walk-in bookings still go in the diary as normal, and block the time exactly like online ones.
Stuck on a step?
Talk to a person. Start a live chat, or email [email protected] and tell us which step you are on — we will help you finish it.
Common questions
About half an hour for most businesses. There are nine short steps and your progress is saved after each one, so you can stop and come back.
No. The 14-day trial needs no card details, and it starts when your business is approved rather than when you register.
Usually a few working hours. A person checks every new business before its booking page goes live, and you are emailed as soon as it is approved.
Yes. When you add a service you choose whether it is one customer at a time or a class that several people book places on, and you can offer both from the same page.
Wait a minute, check your junk or spam folder, and make sure the address is right. You can ask for a new code after a minute. If it still does not arrive, email [email protected] or start a live chat.
Everything you enter during setup can be changed afterwards from your portal: services, hours, team, booking rules and your page. The one to choose carefully is your booking link, because links you have already shared would stop working if you change it.
No. Your booking page works on its own, and you can share the link anywhere. If you do have a website, point a "Book now" button at it.
More guides
Ready to set yours up?
14 days free. No card required. Set up in an afternoon.
Claim your booking link
See if the address you want is free. No account, no card — it takes a second.
No card required · 14 days free · Your progress is saved, so you can stop and come back